Category: Paint
Friday, 6 February 2009 | | Categories: Engine, Paint, Random, Track
Damn, didn't realise it's been so long since my last post. Well, simple reason is I've been busy. Not with the car unfortunately, but work and life in general.
The car though has been used on a daily basis for to and from work duties, and the occasional weekend outing. Even some family transport duties thrown in for good measure, although only when there's four of us (I have three kids, but only two can fit in the back at one time).
Last October, we had the Powercruise come to Perth for the first time. Different to Motorvation, which is more a show and shine with a bit of cruising up and down the drag strip and around the car park, Powercruise is two days of watching the Power skids, and taking you car out onto a race circuit with 20-30 other cars. Racing per se isn't allowed, but it was fun nonetheless. The majority of the those in the event were V8's, many of which had 300+ horsepower, problem was though was having to wait for them to go around a corner. They mostly had no brakes, and suspension setup for drag racing or straight line work. Very frustrating when your car has power, brakes and handling. So I, and others with a similar setup, spent our time weaving around the traffic in a safe manner. At one point I took a died in the wool V8 lover for a drive, and he was amazed at the handling and braking on the car, and it wasn't too shabby when it came time to going in a straight line either. Will definitely be doing it again this year and hope the same guy I was following around in the Commodore ute is there again, we had great fun dicing around the track together.
Now, there has been problems since the car has been on the road with regard to response, which was mentioned back in September after the time out on the skid pan doing a motorkhana. Well, I took it into Sean at Allstar for him to take a look at it on the dyno and basic diagnosis was that either a lifter was sticking, or the heat at high revs was causing the valve to get pinched and stay open. After further conversations with Marc, Josh and Boney over at C-Red, it was decided that a head replacement could be the best solution...but why? Well the head that was used way back then was taken from the block that it sits on, it was ported already so seemed to be logical. It was then sent off to get a full service, but the problem we now have deduced is because it may have already been serviced a couple of times, too much meat had now been taken out of the heads and specifically the valve seats (note this is basically my understanding). As there's now less meat on the seat, the valve sits up in the head too far, and having used way undersized shims, the rockers are now also sitting at an angle they're not really meant to. This would explain why changing the adjustable cams gears during the tuning process didn't make too much of a difference.
What now you say, well during November and December I found and bought a head from Donny at Street Forced Performance in Melbourne. The head has already had porting work undertaken among other stuff. It's now been sitting at C-Red for a couple of months, but finding a time (and cash) to now get the change over done is the problem. I'm now working for myself, which means time off means money I'm not making...and I don't need to tell anyone what takes precedence at the moment.
So, that's where the cars at. There's a few paint problems starting to rear its head now the car has been on the road including some massive ones on the rear bumper where the old bog that was put on it before I started is cracking under the paint. Car still looks a million bucks, and for something that was taken off the road and rebuilt in such a way, it's had relatively minimal problems. Have another day at AHG on Sunday, so hopefully get some pics up from that too very soon.
Cheers
Brendan
Tuesday, 27 June 2006 | | Categories: Brakes, Paint
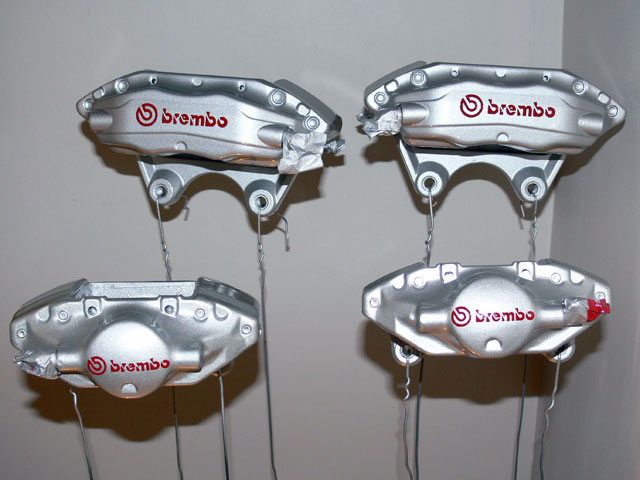
On Saturday I finally completed the R33 GT-R Brembo Brake calipers. Original Black with a White logo, I wanted something different, so using VHT's special Caliper spray paint in Cast Aluminium, Red and Clear, the transformation is now complete.
Cheers
Brendan
Friday, 23 June 2006 | | Categories: Brakes, Paint
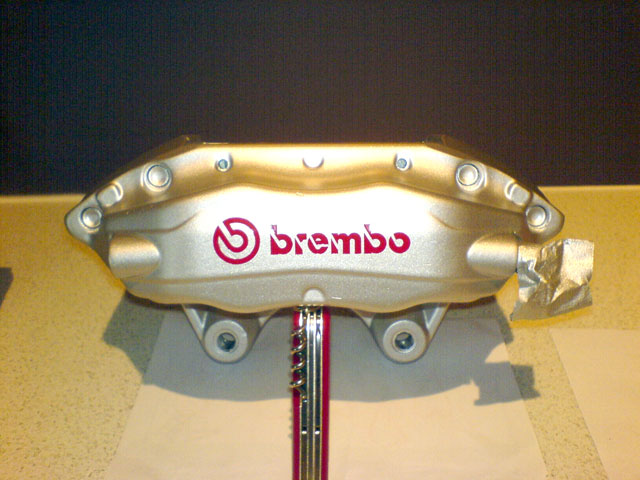
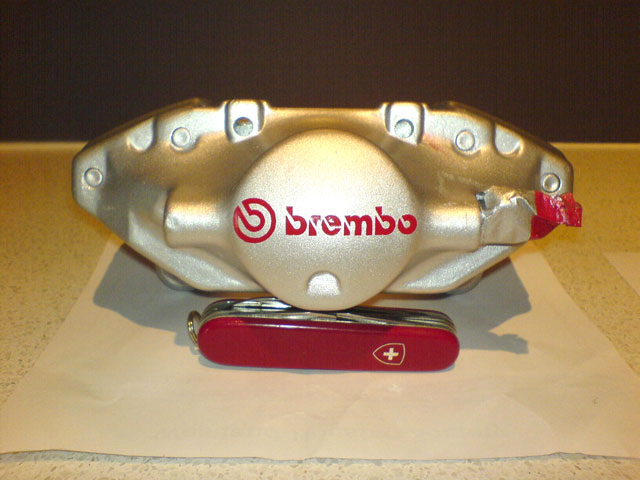
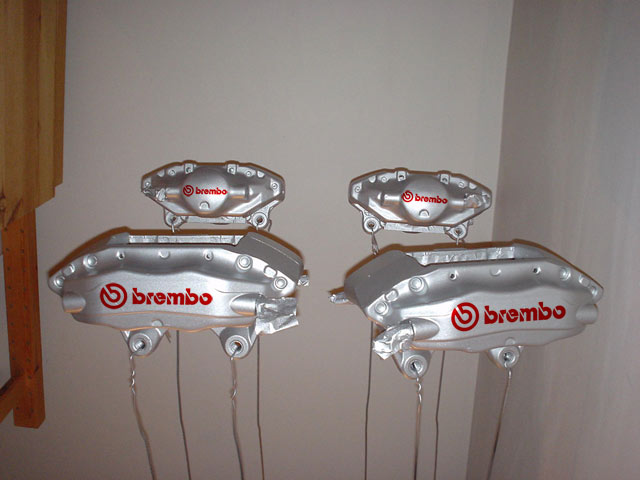
Well, I went home last night - and between my son Kai crying, I managed to paint the red logos onto the calipers. The mask/frisket worked well. Although, I didn't have any idea when to remove the mask, so I tested one of the fronts and it came off OK, with only minor blemishes. Tried one of the rears however and it wasn't as successful. I left the second rear until this morning and it came away really nicely (as pictured). It's not bad for an amateur job, and once it has the clear coats on, the finish should be pretty flash.
Cheers
Brendan
Thursday, 22 June 2006 | | Categories: Brakes, Engine, Driveline, Paint
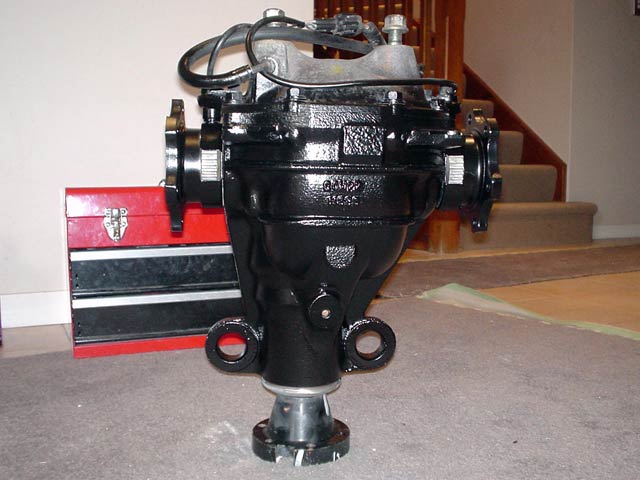
A couple of weeks ago I had to remove a diff for the project from a subframe. This item was from an R33 Skyline GT-R and is a Viscous LSD. Unfortunately it was at the back of the workshop under another two fully loaded subframes. It took a good 30 minutes just to move the one I wanted into a clear area and another hour to remove the differential and half-shafts from the subframe...ugh! I hurt myself in a number of ways while doing this. The reason for going the GT-R diff route rather than a mechanical is that this will be daily and 'grip' driving fun car, not an all out 'drifter', and secondly, I'm running short of funds to purchase a $1500 diff - there's other more important stuff to still get yet.
Once I got the diff and half-shafts home, it was time for a quick de-rust of the diff housing before a rust inhibitor primer and a few coats of the satin black. Looks good too. The rear cover will be replaced with a prepped and painted S13 Silvia one, and the front yoke will be changed to suit the driveshaft. As for the half-shafts, there wasn't so much rust as there was baked-on grease covering the boots. I had a quick go with the prepsol and discovered that with a bit of elbow grease, removal of the nasty grease coating resulted in a new looking boot. Took about 45mins for each half-shaft but the result was worth it, a quick mask and paint and the half shafts were done. At the same time as doing these, I also cleaned and painted up the drive shaft. It's looking pretty schmick, but for the life of my I can't find any photos.
- GT-R Differential Top
- GT-R Differential Bottom
- GT-R Half Shafts
- GT-R Half Shafts Boot closeup
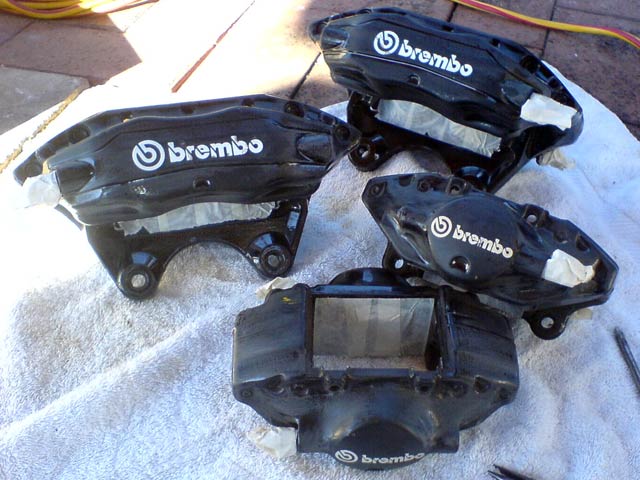
Now another list on the prep list were the Brembos. These are items I kept from the R32 Skyline GT-R that I wrote off a couple of years ago now. They were in top condition and once I decided on colour scheme, it was time for a quick clean and mask followed by 3 coats of the Silver base coat (using VHT Caliper - Cast Aluminium paint). I've now masked up for the new logos to be painted in Red and finally I'll run another 3 coats of the new VHT Clear Gloss Caliper Paint to make it nice and easy to clean the brakes after the hard yards.
- Brembos Prepped and Ready for Paint
- Front Brembo - VHT Cast Aluminium base coat
- Rear Brembo - VHT Cast Aluminium base coat
- All Brembo - hanging in the cupboard
- Front Brembo - Logo Mask
- Rear Brembo - Logo Mask
I couldn't help myself and wait another day to paint the red logo, so have done up a quick and dirty mockup in Photoshop.
Onto another item now. I originally had a China Trust 'Copy' Sump installed on my engine, but after just sitting there for quite a few months, there's evidence of oil leaking. As such, I decided to purchase a genuine Trust/GReddy Oil Pan/Sump. Paid $510 for this from Tanghy on SilviaWA new (thanks Andrew).
- Trust Sump (Top)
- Trust Sump (Bottom)
- Trust Sump (Parts)
Will post up a shot of the Brembo's once finished (like you knew I would anyway).
Cheers
Brendan
Tuesday, 6 June 2006 | | Categories: Exterior, Driveline, Paint
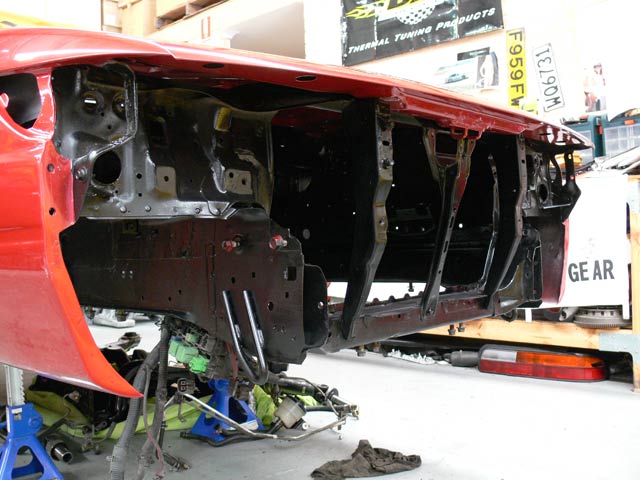
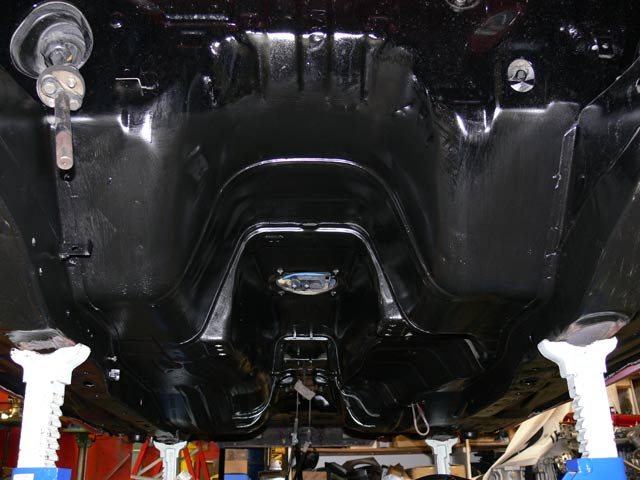
Nothing much to report really, I went in and finished up the underside on Saturday and completed up to the front of the chassis rails (removed front bar to do this). I've now got the all the Brembo's off the Pig now, so will be cleaning and painting them sometime this week. At the moment the plan is to go silver with red Brembo logos - still not sure if these will be painted on or stickered on with a clear over coat.
Next on the prep list is the driveshaft, differential (GT-R) and half-shafts (also GT-R). These are still at the workshop for the time being because if I bring too many parts home the wife gets a little miffed which is quite understandable.
Would have done more work on the car over the weekend, but had to get the bathroom and laundry ready for the tiler starting today. This job was a real paint in the arm. I had already removed the tiles, but that left the adhesive still intact. So out with the bolster and hammer on the walls (hit my hand several times), and them my trusty Ozito jack hammer on the floor. All up I was going at it for 10hrs straight over the weekend.
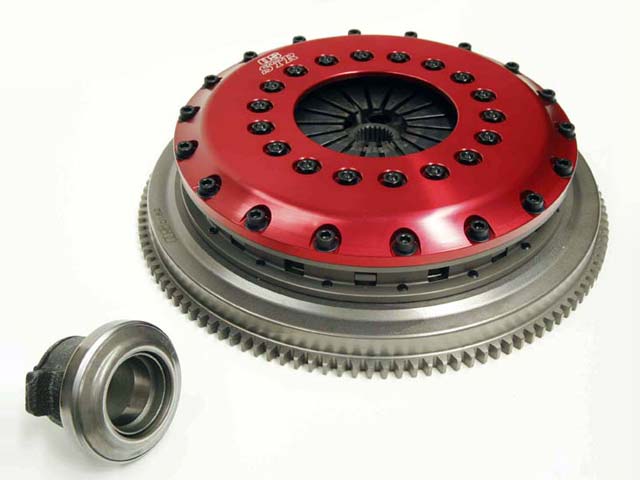
Oh, and I've decided to not much around with the clutch and have an OS Giken STR Twin-plate on order.
The New OS Giken STR series can handle up to 600hp, yet retains drivability very close to standard with 30% lighter pedal effort than most multi-plate clutches. By using special new plate and diaphragm designs, OS Giken has achieved ample power handling with just 715kg clamping pressure. This makes the STR series perfect for everyday driving applications, along with most race and drift applications.
The clutches come complete with lightweight chrome-moly flywheel, ruby red-anodised billet aluminium clutch cover and the required bearing/carrier set or pull-push converter kit where required.
On blog matters, I've managed to secure the use of http://www.sillbeer.com as a domain and am just awaiting the owner to redirect the DNS records to my server before I move the blog over to it. Stay tuned.
Enough for now, more next week.
Cheers
Brendan
Wednesday, 31 May 2006 | | Categories: Exterior, Paint, Suspension
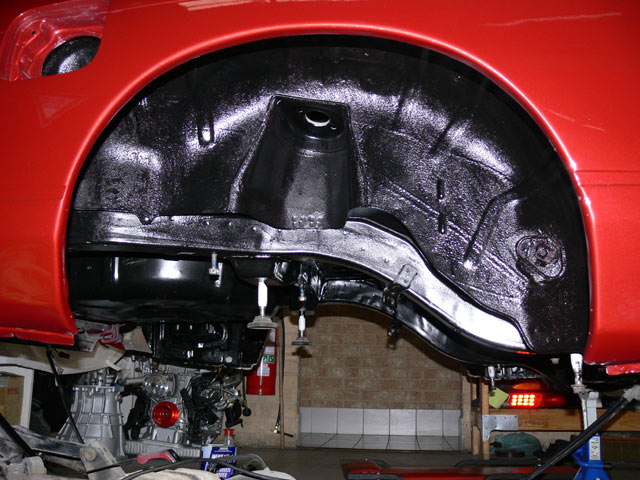
Actually, I felt more like Michaelangelo than Picasso doing the undercarriage painting - being on my back looking up (occasionally dropping paint in my eye/mouth/ear etc). This painting part was a little time consuming, and I still need to apply a second coat in bits (smoother areas) to get rid of the brush marks. The rougher parts under the car were a cinch though so all good there. Still not 100% finished though, as I need to remove the front bar, and paint the end of the chassis rail (see front wheel well pic below) and around under where the radiator is mounted. The paint I used I touched on in the previous post, and to give you an idea of coverage, I've done about 90% of the job with about 80% used of the paint (not much room for error).

- Front Wheel Well Painted
- Rear Wheel Well Painted
- Tunnel Painted (Before 1, Before 2)
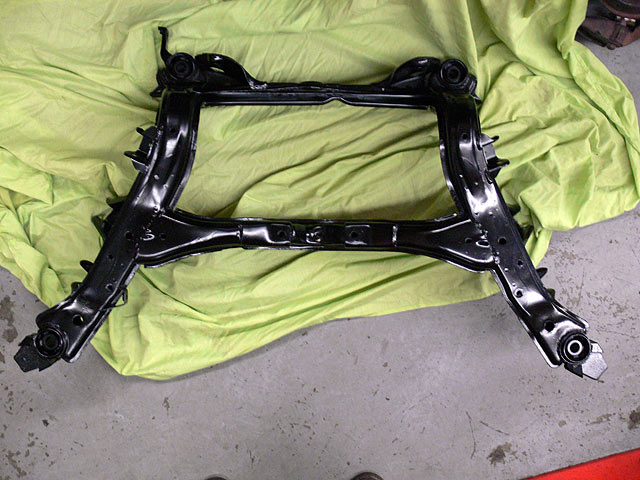
As well as the undercarriage, I've been busy getting all the subframes and associated bits ready to be bolted back together. The rear subframe I had painted up previously, but we had to melt out the subframe bushes which of course messed some of the paint job up so the hold rear subframe was painted again. This then had a set of Nismo Subframe Bushes pushed in. I decided to go with these rather than the aluminium bushes so I don't get as much noise/vibration coming up through the floor. The rear lower control arms have also had their original bushes melted out and they've been resprayed now too. Will be fitting a set of Nolathane bushes (in red of course) into these.
I'll be using an S15 powersteering rack which I cleaned up along with the brackets and heatshield. This will get a new set of rubber boots too. The S13 subassemblies (which the hubs bolt onto) have been cleaned up and painted, and we're hoping we can get a set of 350Z disc brake shields from the 'Track' edition to fit up for the factory look around the R33 GT-R Brembos I have going on.
- Front Subframe
- Front Subassemblies
- Rear Subframe
- Nismo Subframe Bushes 1
- Nismo Subframe Bushes 2
- Rear Lower Control Arms
- S15 Powersteering Rack (among other things)
- Powersteering Rack Heatshield
Next is to complete the undercarriage painting, then onto prep and paint of the brake calipers - which at this point in time will be done in Silver with Red Brembo logo and a coat of gloss clear. Then once all the Kazama suspension parts arrive, the rear end will be bolted together along with (for now) a GT-R diff and half-shafts.
In the meantime, I've gone ahead and ordered the Nismo Power Brace (a review of which is here), Do-Luck Style Ladder Brace (goes between chassis rail under the gearbox) and Rear Lower Tie-Rod Brace (you may have seen these link the rear lower tie-rods together on the rear subframe). Then to make sure I'll be getting enough fuel, I've ordered in a Sard Fuel Collector (Surge) Tank (preview picture). Now I could have gone a normal one, but then the fuel pump would need to be mounted in the boot causing lots of unwanted noise. The beauty of the sard item is that the fuel pump sits inside the surge tank - making it nice and legal, nice huh?! The tank is currently in Melbourne and assume it'll be here by weeks end. Phew.
Cheers
Brendan
Tuesday, 16 May 2006 | | Categories: Brakes, Exterior, Paint, Suspension
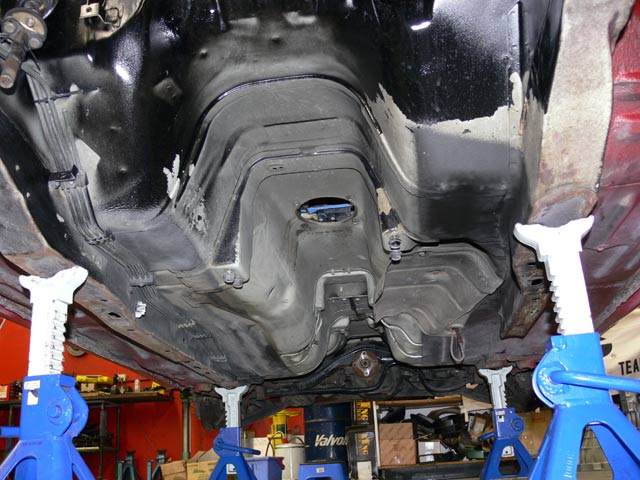
So this Saturday was the start of the final strip. Went out to Bayswater on Friday and picked up some PPC Chassiscoat and PPC Marine Clean. Then once I'd put the wheels back on the car, dropped it, rolled it outside and jacked the front and back up, I proceeded to use the Marine Clean (pretty good stuff) in concert with the Karcher high pressure hose to clean the undercarriage. The photo above is what it looked like after cleaning. It's not 100%, but after a quick wipe over this Saturday with some prepsol, I'll be giving it a nice coat of the PPC Chassiscoat. This paint is specially made for chassis and suspension components as it dries rock hard (a nice Satin Black) and is resistant to stone chips etc.
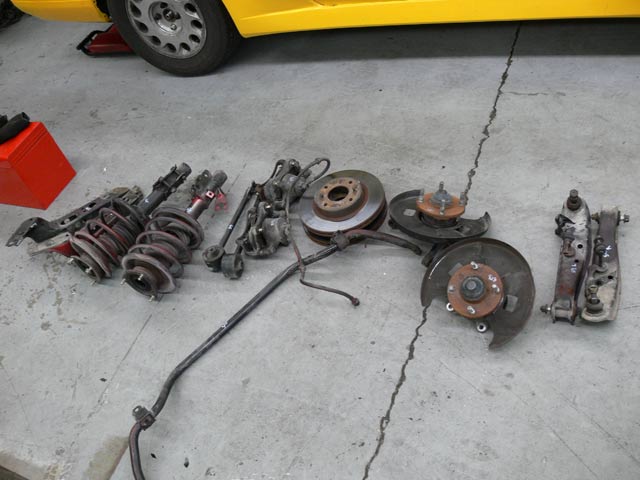
After the clean, a quick blow with the air compressor and it was back inside (after a quick rejig with car positions in the workshop and a mop of the floor - I like a clean working environment after all). Up on stands again, I made quick work of removing the struts, lower chassis rails and finally the front subframe. Dragged out of the road, it was then disassembled so I can clean and paint the subframe (with the Chassiscoat). What you see above is the leftovers that won't be going back on the car, instead replaced with new/used/uprated parts.
- Unpainted front subframe
- Engine bay without subframe
This Saturday it'll be onto removing the rear subframe, clean up the undercarriage a tad more before applying a coat of paint. In the meantime, I've been busy at home. Have cleaned the front subframe, an S15 power-steering rack, front hub knuckles and brake disc shrouds (which will be trimmed so the 330mm Brembo rotors can fit). Will try and spray paint these items before the weekend.
Cheers
Brendan
Tuesday, 9 May 2006 | | Categories: Engine, Exterior, Driveline, Paint
Yeah, I know, lame title, but it's hard to keep coming up with new witty titles all the time 
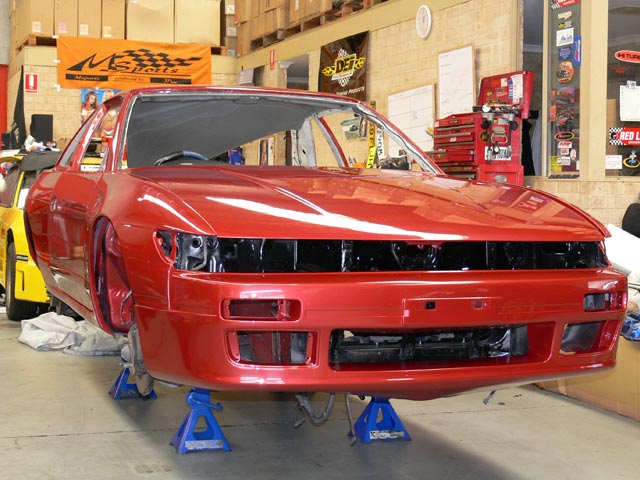
Well after the unfortunate failure of the SD (memory) card in my camera on Saturday, I got another on Monday and scooted out to C-Red to get some replacement pics. It really feels like I'm getting somewhere now, with attention turning to the underside/chassis. Enjoy these pics:
- Front View
- Front View (driver side)
- Front Quarter 1 (driver side)
- Front Quarter 2 (driver side)
- Side View 1 (driver side)
- Side View 2 (driver side)
- Rear View
- Rear View (passenger side)
- Rear Quarter (passenger side)
- Rear Quarter (driver side)
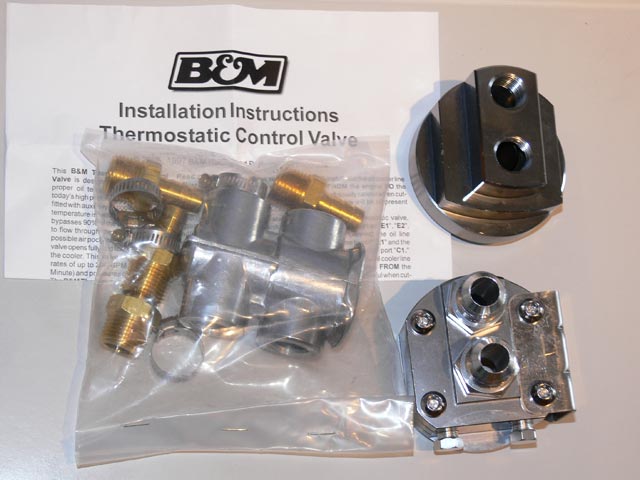
Next up is the arrival of my B&M; Inline Oil Thermostat (in the plastic bag), which I purchased from 'spandex' (who now has a website of his own as well - www.midnightmods.com.au) on the NissanSilvia.com forums (highly recommend the great service you'll get). This will make up along with the oil filter sandwich plates and the remote oil filter mount, the main part of my oil cooler setup. Still to get will be the oil cooler core which will probably be a top quality Serco unit from Go Gear in Mt Hawthorn. Once it's all mounted, I'll get the Earls lines made up to suit again with the Black connectors rather than the standard blue and red ones.
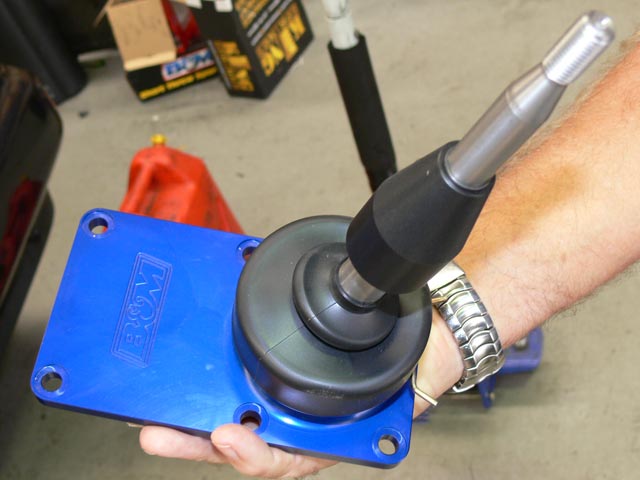
Another item to arrive recently through C-Red was this B&M; Short Shifter for the S13 gearbox. This will reduce the throw required on gear changes, making way for quicker times on the track when needed. This will mount up on the gearbox which has been resprayed, but may be powder coated instead now.
- B&M; Short Shifter for S13 (top)
- B&M; Short Shifter for S13 (bottom)
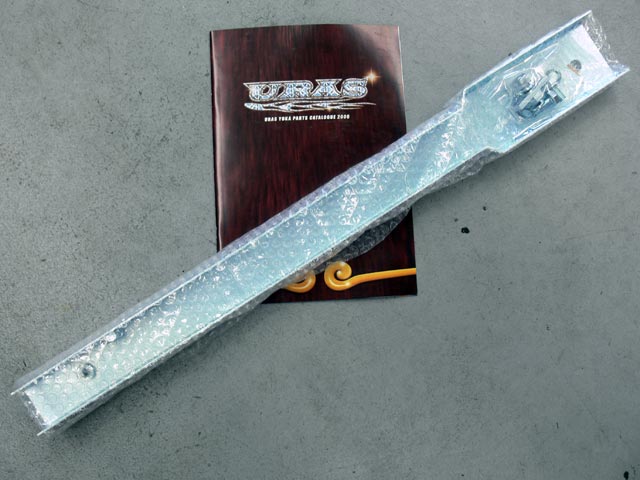
And finally, I received my new URAS S13 Chassis Rail from Japan. I ordered this through 'BT-Revolution' on the NissanSilvia.com forums and again I recommend this trader as I was taken care of very well. Now, why do I need a chassis rail, well if you've ever peeked under the S13, you notice that the passenger side chassis rail doesn't run all the way to the rear before supporting the rear sub-frame. Well this item bolts up and completes the missing rail, increasing chassis rigidity. For the rest of the chassis, I already have the Cusco strut tower bars, Zenith A-Pillar braces and the Zenith rear boot brace, I'm still looking into tying parts of the gearbox tunnel together along with a front castor rod chassis brace of some sort (either small brace or Nismo Power Brace).
Well hope you enjoyed this Mega May update, should be accelerating the amount being done to the car now that it's back in my possession (so to speak).
Cheers
Brendan
(aka. Grandpa [SWA], Sillbeer [NS] or VSPEC32 [SAU])
Saturday, 8 April 2006 | | Categories: Exterior, Old School, Paint
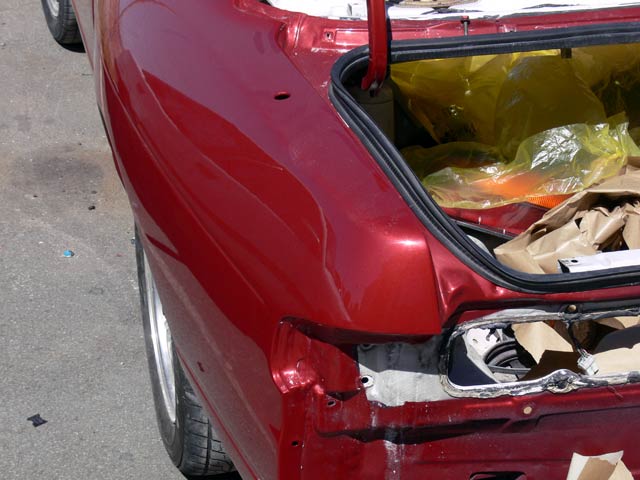
Sorry for the delay in getting the pics up, but been a busy week. Anyway, these were taken last week at the painters, so haven't seen since they've buffed it up. For those who don't want to read back the colour is from Mazda and called Velocity Red. It's available through most of their model line up from the Mazda 3 up to the RX-8.
Red will certainly make this faster:
- Rear Quarter (passenger side)
- Rear Quarter (driver side)
- Rear View (passender side)
- Rear View (driver side)
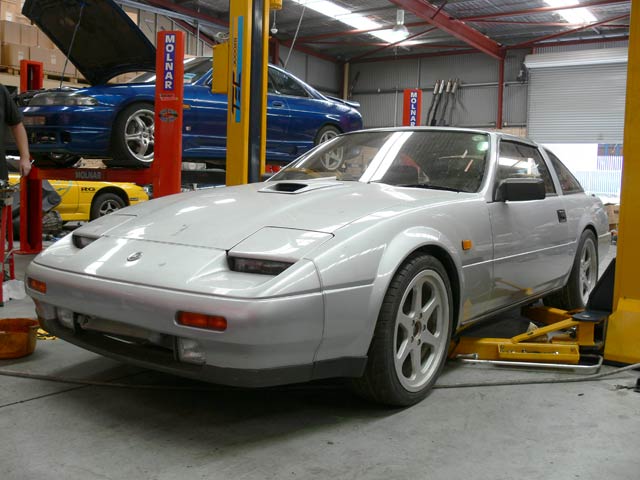
On another note, I'm looking to move the Galant Sigma Turbo on. Have had/known here for over 13 years and she's clocked over 300,000kms (160,000km on its current rebuild - done by Malcolm Crockenburg, the WA Ralliart arm). And this is by no means set in stone (needs to be cleared by the Finance Ministry), but C-Red have a beautiful late 80's piece of machinery that I've been eyeing off since it landed in mid/late 2004. It's a 1988 Nissan 200ZR-II Fairlady, in Silver, running an RB20DET ECCS (standard engine for this car) with some light modifications. It needs a bit of a clean up, but we've cranked her over and she starts first pop and Jeff has had the rust cut out too so that's a bonus.
On 18's and low, she sits beautifully, although it's a bit too low at the moment:
- 200ZR Front
- 200ZR Side/Rear
- 200ZR Targa Roof
- 200ZR RB20DET ECCS Engine Bay
If anyone is interested in a great reliable bunky (with aircon, CD player and recently fitted Mitsubishi FTO sports seats), send us a message.
Cheers
Brendan
Sunday, 29 January 2006 | | Categories: Paint, Suspension
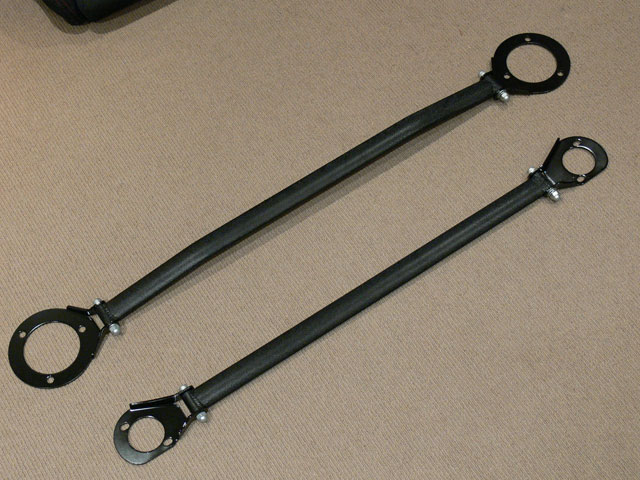
So I had these Cusco OS Type Strut Tower braces for the front and rear of the Silvia which just weren't going to match the rest of the car. With Blue painted end plates and polished allow bars, they're Cusco's standard fare. So, I figured I would refinish them to a more OEM look, which is where I'm going with the car - factory special. So to start out with I've sandblasted the end plates (along with a Cusco Brake Stopper - yet to be completed) and sanded back the bars nice and smooth. The plan was for the end plates in Satin Black and the cross bars to be in black wrinkle paint. Hanging all this from a rafter in my carport using old wire clothes hangers, I went about spraying them. The wrinkle paint is pretty special stuff...it goes on smooth, and after 20 minutes to 2 hours, it starts to wrinkle evenly. The more coats you put on, the more intense the wrinkles. In all I applied 4 coats to get the finish you see below. Check out the pics for the stages and end product.
Step-by-step, sorta:
- Original End Plates
- Sandblasted End Plates
- Painted End Plates
- Original Strut Bars
- Original Strut Bars (Detail)
- Sanded Strut Bars
- Completed Front and Rear Strut Tower Bars
- Completed Front Strut Tower Bars
- Completed Rear Strut Tower Bars
- Detail of Wrinkle Finish
In other news, the trayback went to pick up the car on Friday to bring back to the workshop only to final that Assure was closed (being between Australia Day and the weekend). So we should have it back early next week.
Cheers
Brendan
